Introduction
Video Tutorial | Discord Support | Scripting Reference | Contact Me
Scripting Reference
A complete scripting reference is available here: https://ryanzehm.com/unity/Documentation/AdditiveSceneManager
What is Additive Scene Manager?
Dealing with additive scenes and asynchronous scene loading can be difficult and confusing. This asset provides a set of functions that simplifies the asynchronous loading and unloading of additive scenes. The SceneController script has a custom inspector and In-Game UI to display which scenes are loading/loaded so it’s easy to understand what is happening and what loading stage each scene is at.
Terminology
| Scene Controller | The main script for loading, unloading, and reloading scenes. Scripting Reference: Scene Controller |
| Active Scene | The “Active Scene” is the Scene which will be used as the target for new GameObjects instantiated by scripts and from which Scene the lighting settings are used. SceneManager.SetActiveScene |
| Activate Scene | * These 2 are extremely similar, “Active” vs “Activate”- be careful.* To “Activate” a scene is to set its allowSceneActivation boolean to true, allowing the loading of progress from 0.9 to 1.0. A scene will not be visible, nor will OnEnable, Awake, or Start, run until a scene is activated. AsyncOperation.allowSceneActivation |
| Additive Scene | A scene which is loaded at the same time as other scenes, multiple scenes loaded at once. LoadSceneMode.Additive |
| Asynchronous Loading | Load a Scene on a separate background thread while the main thread continues to run the core game loop. SceneManager.LoadSceneAsync |
| Thread Priority | Priority of a background loading thread. Lower priority means a background operation will run less often and will take up less time, so loading progress will be slower (Higher FPS).Higher priority means a background operation will run more often and will take up more time, so loading progress will be faster (Lower FPS). Application.backgroundLoadingPriority |
How To Use
The player/camera is the object that needs to move between the additive scenes. The main scene with Main Camera should have a Game Controller. More info can be found here: https://unity3d.com/learn/tutorials/topics/scripting/persistence-saving-and-loading-data
- Create a Game Controller
If you do not have a game controller already, add a new empty GameObject, name it appropriately, and add Unity’s default tag GameController:

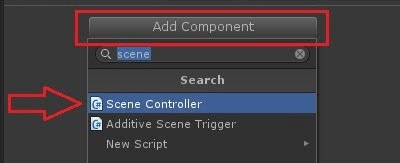
- Add a Scene Controller Component
SceneController.cs
The SceneContoller script contains functions for loading and unloading scenes. Add this script to your GameController:
The SceneController editor gives the ability to:
- Add scenes that will be loaded when the game starts.
- Add ‘persistent’ scenes that will not be unloaded by SceneController’s Unload functions.
- View all scenes which are currently loaded by Unity’s SceneManager class.
- View what loading stage each scene is at:
 Green Green | Fully Loaded. Async progress 1.0 (Async operation is completed/null) |
 Yellow Yellow | Loaded but not activated. Async progress 0.9 (allowSceneActivation is false) |
 Red Red | Loading in progress. Async progress 0.0 – 0.8. (Async operation is loading data) |
- Set the allowSceneActivation boolean to true ( “+” Button for a Yellow Scene).
- Unload a scene from the Editor (“-” Button for a Green Scene).
- Bake lightmaps on all open scenes.
- Set the Background Thread Loading Priority.

- Add an Additive Scene Trigger to your scene.
AdditiveSceneTrigger.cs
This script uses the SceneController functions so you can get additive scenes working in your project without using any code. AdditiveSceneTrigger requires a Unity trigger, so add a collider and set Is Trigger:

- Visible Scenes is a list of scenes that are visible from this trigger. Any scene that is added here will be asynchronously loaded when the player enters this trigger. All other scenes will be unloaded, except Persistent Scenes.
- The Tag “Player” must be assigned to the Player/Main Camera object:

(see AdditiveSceneTrigger.cs: if (!other.gameObject.CompareTag(“Player”)) return;)
Upgrading Additive Scene Manager
When upgrading Additive Scene Manager, do not overwrite your settings file. The settings file is located at /Nurface/AdditiveSceneManager/Resources/SceneControllerSettings.asset.

Deselect this folder/file when upgrading Additive Scene Manager, or the settings on the SceneController class will be overwritten.
Lightmapping Multiple Scenes
It is possible to bake lighting on multiple opened scenes at the same time. This uses the Unity Scripting API function, Lightmapping.BakeMultipleScenes. Open all of the scenes that you want to bake within the Hierarchy Window and then click the “Bake Lightmaps On All Open Scenes” button on the Scene Controller Inspector:

Unity will be unresponsive until the bake has finished on all scenes. This operation is currently not possible to run additively like a normal lightmap bake. I’ve opened a feature request for this, so that Unity Editor can be used while a multi-scene bake is running:
- Feature Request approved & implemented by Unity- thanks for your help!
Demo Project
The included project located at /AdditiveSceneManager/Demo/ has 9 scenes for how an example game may be set up. To see the complete project, load all 9 scenes in Unity:

The idea is that the PlayerCamera scene and the Sun scene are to be loaded at all times, and each room will be loaded additively. Each room has an AdditiveSceneTrigger script with the visible scenes configured. In this example, we have only set the “Visible Scenes” for each room to be the room directly next to it. The following image shows how the middle room, RoomB, is configured:

Open the PlayerCamera scene and select the GameController gameobject.
- Scenes To Load At Start should be set to: PlayerCamera, Sun, RoomA
- Persistent Scenes should be set to: PlayerCamera, Sun

- Important! Ensure the Player gameobject has the Player tag set:

You are now ready to play the demo, and each room will be loaded additively and asynchronously and any scene that is not persistent nor visible will be automatically unloaded.
- In the demo, click to move the character between rooms / scenes.
Additional Support
Current Tutorial Video: https://youtu.be/4OD-_EczO8s
Discord Support: https://discord.gg/jrvzFbJhYj
Join on YouTube for Unity Development & other interesting topics: https://www.youtube.com/ryanzehm
For any questions or support, please contact me here: https://ryanzehm.com/unity/contact/